🏗️Build a Full-Stack NFT dApp
In this tutorial, you’ll build an NFT minter and learn how to create a full stack dApp by connecting your smart contract to a React frontend using Metamask and Web3 tools.
One of the greatest challenges for developers coming from a Web2 background is figuring out how to connect your smart contract to a front-end project and interact with it.
By building an NFT minter—a simple UI where you can input a link to your digital asset, a title, and a description —you'll learn how to:
Connect to Metamask via your frontend project
Call smart contract methods from your frontend
Sign transactions using Metamask
In this tutorial, we will be using React as our front-end framework. Because this tutorial is primarily focused on Web3 development, we won't be spending much time breaking down React fundamentals. Instead, we'll be focusing on bringing functionality to our project
As a prerequisite, you should have a beginner-level understanding of React—know how components, props, useState/useEffect, and basic function calling works. If you've never heard of any of those terms before, you may want to check out this Intro to React tutorial. For the more visual learners, we highly recommend this excellent Full Modern React Tutorial video series by Net Ninja.
Without further ado, let's get started!
Step 0: Making NFTs 101
Before we even start looking at any code, it's important to understand how making an NFT works. It involves two steps:
1) You publish an NFT smart contract on the Ethereum blockchain. Usually, this is an ERC-721 or ERC-1155 smart contract.
The biggest difference between the two NFT smart contact standards is that ERC-1155 is a multi-token standard and includes batch functionality, whereas with the ERC-721 is a single-token standard and therefore only supports transferring one token at a time.
2) You call the minting function on that NFT smart contract to mint the NFT. Minting is simply the act of publishing a unique instance of your nonfungible token on the blockchain.
Usually, this minting function requires you to pass in two variables as parameters, first the recipient, which specifies the address that will receive your freshly minted NFT, and second the NFT's tokenURI , a string that resolves to a JSON document describing the NFT's metadata.
An NFT's metadata is really what brings it to life, allowing it to have properties, such as a name, description, image (or different digital asset), and other attributes. Here's an example of a tokenURI, which contains an NFT's metadata.
In this tutorial, we're going to focus on part 2, calling an existing NFT's smart contract minting function using our React UI.
Here's a link to the ERC-721 NFT smart contract we will be calling in this tutorial. If you'd like to learn how we made it, we highly recommend that you check out our other tutorial, "How to Create an NFT."
Cool, now that we understand how making an NFT works, let's clone our starter files!
Step 1: Clone the starter files
First, go to the nft-minter-tutorial GitHub repository to get the starter files for this project. Clone this repository into your local environment.
Don't know how to clone a repository? Check out this guide from Github.
When you open this cloned nft-minter-tutorial repository, you'll notice that it contains two folders: minter-starter-files and nft-minter.
minter-starter-files contains the starter files (essentially the React UI) for this project. In this tutorial, we will be working in this directory, as you learn how to bring this UI to life by connecting it to your Ethereum wallet and an NFT smart contract.
nft-minter contains the entire completed tutorial and is there for you as a reference if you get stuck.
Next open your copy of minter-starter-files in to your favorite code editor (at Alchemy, we we're big fans of VSCode), and then navigate into your src folder:
We will work inside the "src" folder
All of the code we'll write will live under the src folder. We'll be editing the Minter.js component and writing additional javascript files to give our project Web3 functionality.
Step 2: Check out our starter files
to Before we start coding, it's important check out what's already provided for us in the starter files.
Get your react project running
Let's start by running the React project in our browser. The beauty of React is that once we have our project running in our browser, any changes we save will be updated live in our browser.
To get the project running, navigate to the root directory of the minter-starter-files folder, and the run npm install in your terminal to install the dependencies of the project:
cd minter-starter-files
npm install
Once those have finished installing, run npm start in your terminal:
npm startDoing so should open http://localhost:3000/ in your browser, where you'll see the frontend for our project. It should consist of 3 fields: a place to input a link to your NFT's asset, enter the name of your NFT, and provide a description.
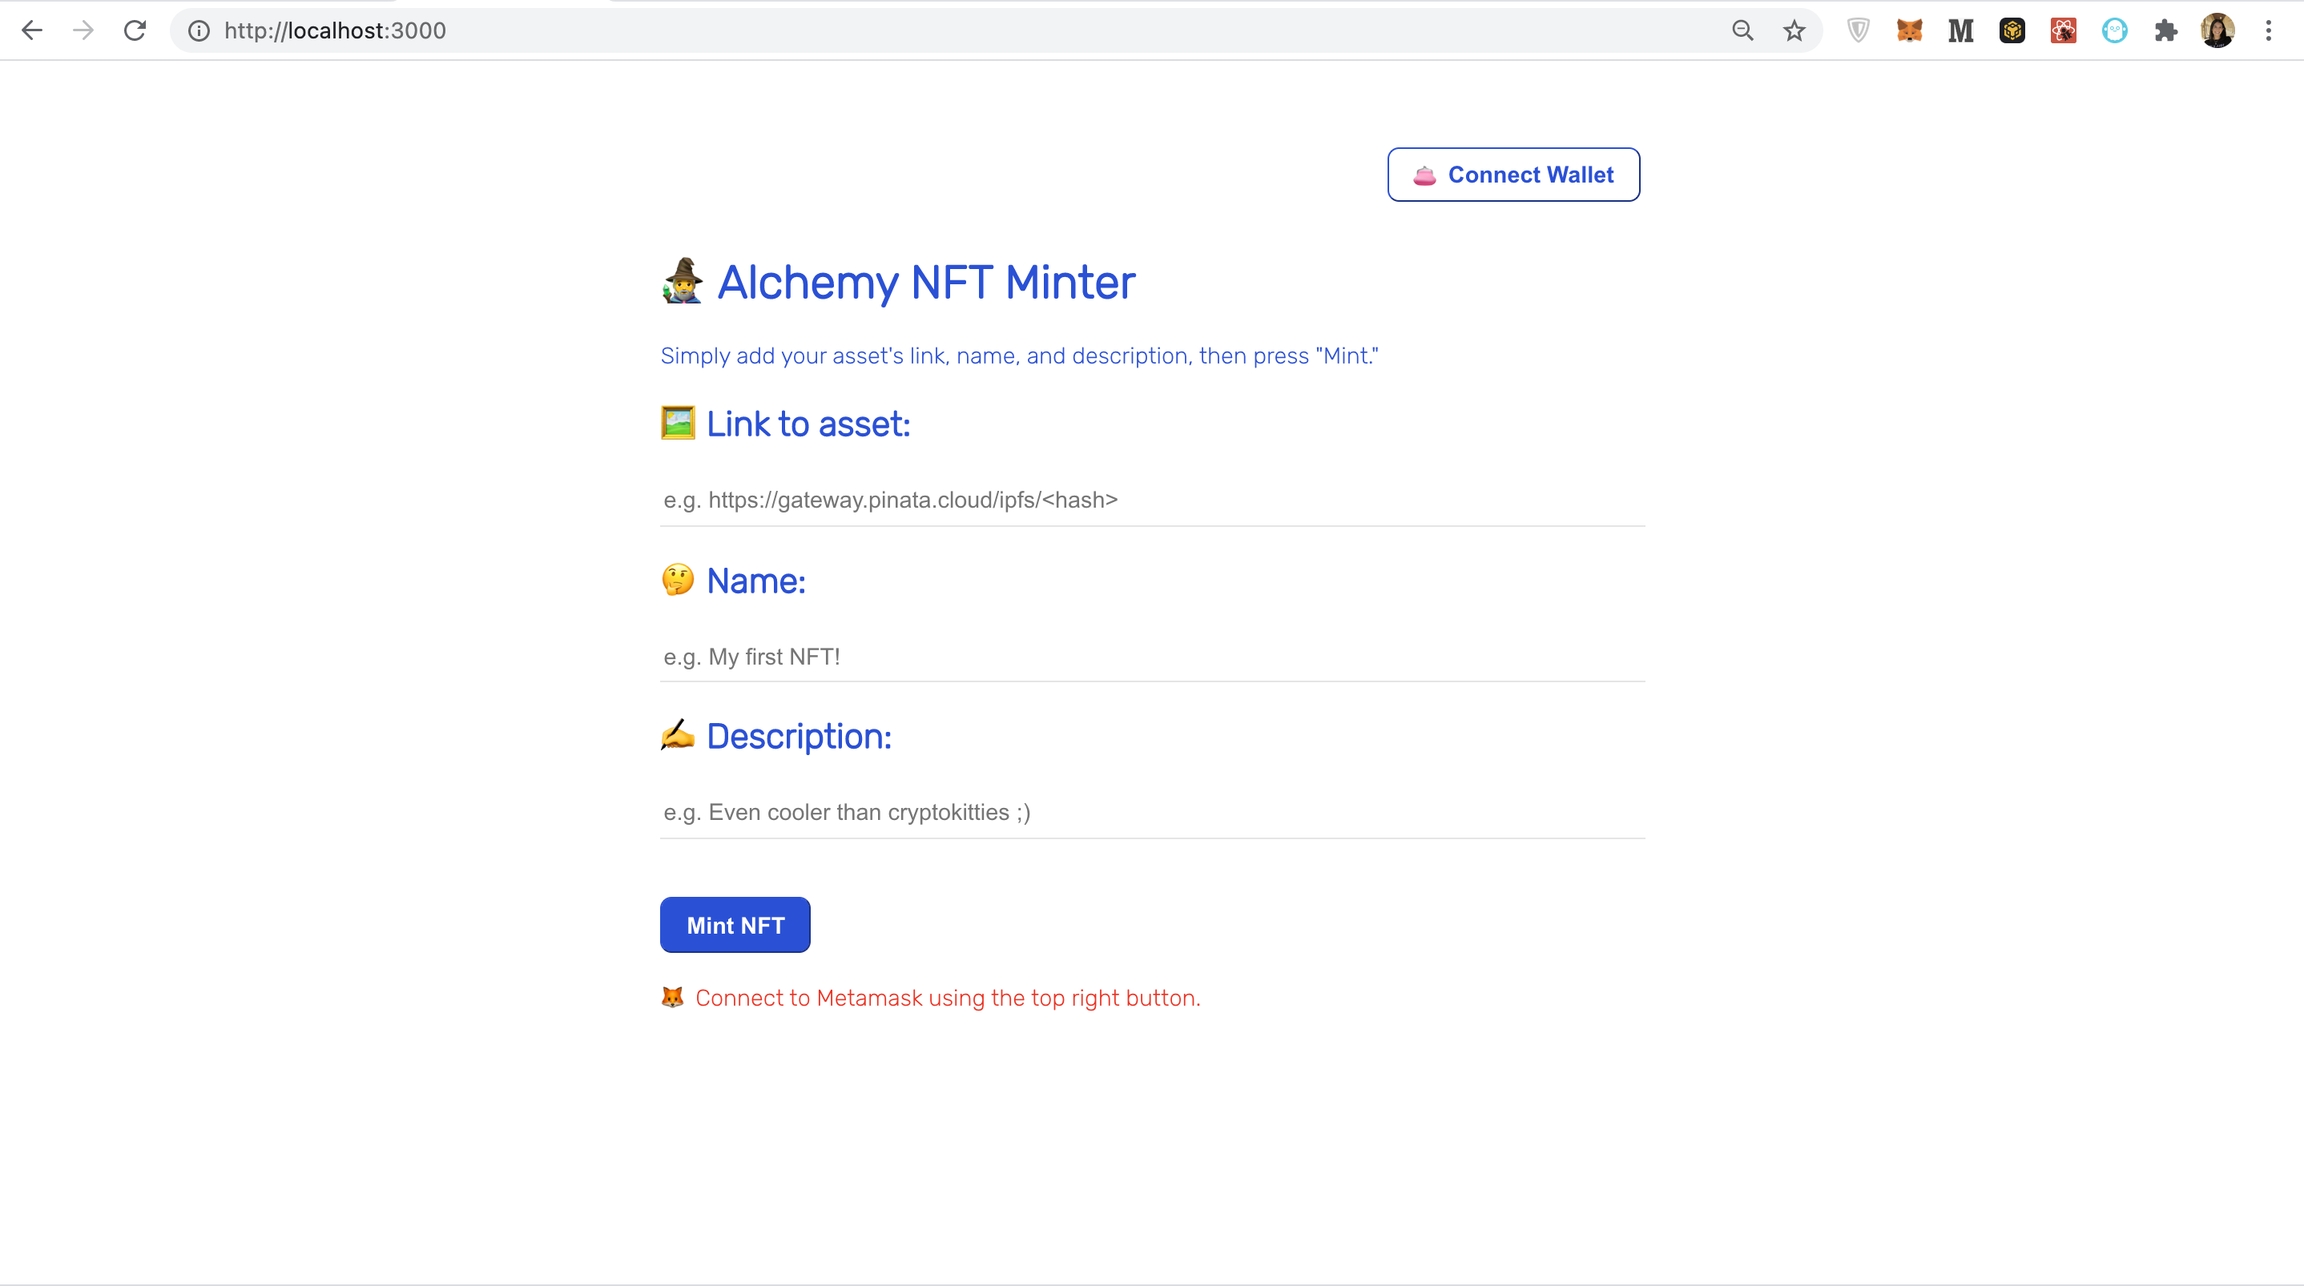
What your UI should look like
If you try clicking "Connect Wallet" or "Mint NFT" buttons, you'll notice they don't work—that's because we still need to program their functionality! :)
The Minter.js component
NOTE: Make sure you're in the minter-starter-files folder and not the nft-minter folder!
Let's go back into the src folder in our editor and open the Minter.js file. It's super important that we understand everything in this file, as it is the primary React component we will be working on.
At the top of our this file, we have the state variables that we will update after specific events.
//State variables
const [walletAddress, setWallet] = useState("");
const [status, setStatus] = useState("");
const [name, setName] = useState("");
const [description, setDescription] = useState("");
const [url, setURL] = useState("");
Never heard of React state variables or state hooks? Check out these docs.
Here's what each of the variables represents:
walletAddress - a string that stores the user's wallet address
status - a string that contains a message to display at the bottom of the UI
name - a string that stores the NFT's name
description - a string that stores the NFT's description
url - a string that is a link to the NFT's digital asset
After the state variables, you'll see three un-implemented functions: useEffect, connectWalletPressed, and onMintPressed. You'll notice that all of these functions are async, that's because we will be making asynchronous API calls in them! Their names are eponymous with their functionalities:
useEffect(async () => { //TODO: implement

}, []);

const connectWalletPressed = async () => { //TODO: implement

};

const onMintPressed = async () => { //TODO: implement

};useEffect- this is a React hook that is called after your component is rendered. Because it has an empty array [] prop passed into it (see line 3), it will only be called on the component's first render. Here we'll call our wallet listener and another wallet function to update our UI to reflect whether a wallet is already connected.
connectWalletPressed - this function will be called to connect the user's Metamask wallet to our dApp.
onMintPressed - this function will be called to mint the user's NFT.
Near the end of this file, we have the UI of our component. If you scan this code carefully, you'll notice that we update our url, name, and description state variables when the input in their corresponding text fields change.
You'll also see that connectWalletPressed and onMintPressed are called when the buttons with IDs mintButton and walletButton are clicked respectively.
//the UI of our component
return (
<div className="Minter">
<button id="walletButton" onClick={connectWalletPressed}>
{walletAddress.length > 0 ? (
"Connected: " +
String(walletAddress).substring(0, 6) +
"..." +
String(walletAddress).substring(38)
) : (
<span>Connect Wallet</span>
)}
</button>
<br></br>
<h1 id="title">🧙♂️ Alchemy NFT Minter</h1>
<p>
Simply add your asset's link, name, and description, then press "Mint."
</p>
<form>
<h2>🖼 Link to asset: </h2>
<input
type="text"
placeholder="e.g. https://gateway.pinata.cloud/ipfs/<hash>"
onChange={(event) => setURL(event.target.value)}
/>
<h2>🤔 Name: </h2>
<input
type="text"
placeholder="e.g. My first NFT!"
onChange={(event) => setName(event.target.value)}
/>
<h2>✍️ Description: </h2>
<input
type="text"
placeholder="e.g. Even cooler than cryptokitties ;)"
onChange={(event) => setDescription(event.target.value)}
/>
</form>
<button id="mintButton" onClick={onMintPressed}>
Mint NFT
</button>
<p id="status">
{status}
</p>
</div>
);
Finally, let's address where is this Minter component added.
If you go to the App.js file, which is the main component in React that acts as a container for all other components, you'll see that our Minter component is injected on line 7.
In this tutorial, we'll only be editing the Minter.js file and adding files in our src folder.
Now that we understand what we're working with, let's set up our Ethereum wallet!
Step 3: Set up your Ethereum wallet
For users to be able to interact with your smart contract they will need to connect their Ethereum wallet to your dApp.
Download Metamask
For this tutorial, we’ll use Metamask, a virtual wallet in the browser used to manage your Ethereum account address. If you want to understand more about how transactions on Ethereum work, check out this page from the Ethereum foundation.
You can download and create a Metamask account for free here. When you are creating an account, or if you already have an account, make sure to switch over to the “Ropsten Test Network” in the upper right (so that we’re not dealing with real money).
Add ether from a Faucet
In order to deploy our smart contract to the test network, we’ll need some fake Eth. To get Eth you can go to the Goerli faucet and enter your Goerli account address, then click “Send Me Eth.” You should see Eth in your Metamask account soon after!
Check your Balance
To double-check check our balance is there, let’s make an eth_getBalance request using Alchemy’s composer tool. This will return the amount of Eth in our wallet. After you input your Metamask account address and click “Send Request”, you should see a response like this:
{"jsonrpc": "2.0", "id": 0, "result": "0xde0b6b3a7640000"}NOTE: This result is in wei not eth. Wei is used as the smallest denomination of ether. The conversion from wei to eth is: 1 eth = 10¹⁸ wei. So if we convert 0xde0b6b3a7640000 to decimal we get 1*10¹⁸ which equals 1 eth.
Phew! Our fake money is all there! 🤑
Step 4: Connect Metamask to your UI
Now that our Metamask wallet is set up, let's connect our dApp to it!
Because we want to prescribe to the M-V-C paradigm, we're going to create a separate file that contains our functions to manage the logic, data, and rules of our dApp, and then pass those functions to our frontend (our Minter.js component).
The connectWallet function
To do so, let's create a new folder called utils in your src directory and add a file called interact.js inside it, which will contain all of our wallet and smart contract interaction functions.
In our interact.js file, we will write a connectWallet function, which we will then import and call in our Minter.js component.
In your interact.js file, add the following
export const connectWallet = async () => {
  if (window.ethereum) {
    try {
      const addressArray = await window.ethereum.request({
        method: "eth_requestAccounts",
      });
      const obj = {
        status: "👆🏽 Write a message in the text-field above.",
        address: addressArray[0],
      };
      return obj;
    } catch (err) {
      return {
        address: "",
        status: "😥 " + err.message,
      };
    }
  } else {
    return {
      address: "",
      status: (
        <span>
          <p>
            {" "}
            🦊{" "}
            <a target="_blank" href={`https://metamask.io/download.html`}>
              You must install Metamask, a virtual Ethereum wallet, in your
              browser.
            </a>
          </p>
        </span>
      ),
    };
  }
};
Let's breakdown what this code does:
First, our function checks if it window.ethereum is enabled in your browser.
window.ethereum is a global API injected by Metamask and other wallet providers that allows websites to request users' Ethereum accounts. If approved, it can read data from the blockchains the user is connected to, and suggest that the user sign messages and transactions. Check out the Metamask docs for more info!
If window.ethereum is not present, then that means Metamask is not installed. This results in a JSON object being returned, where address returned is an empty string, and the status JSX object relays that the user must install Metamask.
Most of the functions we write will be returning JSON objects that we can use to update our state variables and UI.
Now if window.ethereum is present, then that's when things get interesting.
Using a try/catch loop, we'll try to connect to Metamask by calling window.ethereum.request({ method: "eth_requestAccounts" }); Calling this function will open up Metamask in the browser, whereby the user will be prompted to connect their wallet to your dApp.
If the user chooses to connect, method: "eth_requestAccounts" will return an array that contains all of the user's account addresses that connected to the dApp. Altogether, our connectWallet function will return a JSON object that contains the first address in this array (see line 9) and a status message that prompts the user to write a message to the smart contract.
If the user rejects the connection, then the JSON object will contain an empty string for the address returned and a status message that reflects that the user rejected the connection.
Add connectWallet function to your Minter.js UI Component
Now that we've written this connectWallet function, let's connect it to our Minter.js. component.
First, we'll have to import our function into our Minter.js file by adding
import { connectWallet } from "./utils/interact.js"; to the top of the Minter.js file. Your first 11 lines of Minter.js should now look like this:
import { useEffect, useState } from "react";
import { connectWallet } from "./utils/interact.js";

const Minter = (props) => {

  //State variables
  const [walletAddress, setWallet] = useState("");
  const [status, setStatus] = useState("");
  const [name, setName] = useState("");
  const [description, setDescription] = useState("");
  const [url, setURL] = useState("");
Then, inside our connectWalletPressed function, we'll call our imported connectWallet function, like so:
const connectWalletPressed = async () => {
  const walletResponse = await connectWallet();
  setStatus(walletResponse.status);
  setWallet(walletResponse.address);
};
Notice how most of our functionality is abstracted away from our Minter.js component from the interact.js file? This is so we comply with the M-V-C paradigm!
In connectWalletPressed, we simply make an await call to our imported connectWallet function, and using its response, we update our status and walletAddress variables via their state hooks.
Now, let's save both files (Minter.js and interact.js) and test out our UI so far.
Open your browser on the http://localhost:3000/ page, and press the "Connect Wallet" button on the top right of the page.
If you have Metamask installed, you should be prompted to connect your wallet to your dApp. Accept the invitation to connect.
You should see that the wallet button now reflects that your address is connected! Yasssss 🔥
Next, try refreshing the page... this is strange. Our wallet button is prompting us to connect Metamask, even though it is already connected...
The problem on page reload
Don't worry though! We easily can fix that by implementing a function called getCurrentWalletConnected, which will check if an address is already connected to our dApp and update our UI accordingly!
The getCurrentWalletConnected function
In your interact.js file, add the following getCurrentWalletConnected function:
export const getCurrentWalletConnected = async () => {
  if (window.ethereum) {
    try {
      const addressArray = await window.ethereum.request({
        method: "eth_accounts",
      });
      if (addressArray.length > 0) {
        return {
          address: addressArray[0],
          status: "👆🏽 Write a message in the text-field above.",
        };
      } else {
        return {
          address: "",
          status: "🦊 Connect to Metamask using the top right button.",
        };
      }
    } catch (err) {
      return {
        address: "",
        status: "😥 " + err.message,
      };
    }
  } else {
    return {
      address: "",
      status: (
        <span>
          <p>
            {" "}
            🦊{" "}
            <a target="_blank" href={`https://metamask.io/download.html`}>
              You must install Metamask, a virtual Ethereum wallet, in your
              browser.
            </a>
          </p>
        </span>
      ),
    };
  }
};
This code is very similar to the connectWallet function we just wrote earlier.
The main difference is that instead of calling the method eth_requestAccounts, which opens Metamask for the user to connect their wallet, here we call the method eth_accounts, which simply returns an array containing the Metamask addresses currently connected to our dApp.
To see this function in action, let's call it in the useEffect function of our Minter.js component.
Like we did for connectWallet, we must import this function from our interact.js file into our Minter.js file like so:
import { useEffect, useState } from "react";
import {
  connectWallet,
  getCurrentWalletConnected //import here
} from "./utils/interact.js";
Now, we simply call it in our useEffect function:
useEffect(async () => {
    const {address, status} = await getCurrentWalletConnected();
    setWallet(address)
    setStatus(status);
}, []);
Notice, we use the response of our call to getCurrentWalletConnected to update our walletAddress and status state variables.
Once you've added this code, try refreshing our browser window. The button should say that you're connected, and show a preview of your connected wallet's address - even after you refresh! 😅
Implement addWalletListener
The final step in our dApp wallet setup is implementing the wallet listener so our UI updates when our wallet's state changes, such as when the user disconnects or switches accounts.
In your Minter.js file, add a function addWalletListener that looks like the following:
function addWalletListener() {
  if (window.ethereum) {
    window.ethereum.on("accountsChanged", (accounts) => {
      if (accounts.length > 0) {
        setWallet(accounts[0]);
        setStatus("👆🏽 Write a message in the text-field above.");
      } else {
        setWallet("");
        setStatus("🦊 Connect to Metamask using the top right button.");
      }
    });
  } else {
    setStatus(
      <p>
        {" "}
        🦊{" "}
        <a target="_blank" href={`https://metamask.io/download.html`}>
          You must install Metamask, a virtual Ethereum wallet, in your
          browser.
        </a>
      </p>
    );
  }
}
Let's quickly break down what's happening here:
First, our function checks if window.ethereum is enabled (i.e. Metamask is installed).
If it's not, we simply set our status state variable to a JSX string that prompts the user to install Metamask.
If it is enabled, we set up the listener window.ethereum.on("accountsChanged") on line 3 that listens for state changes in the Metamask wallet, which include when the user connects an additional account to the dApp, switches accounts, or disconnects an account. If there is at least one account connected, the walletAddress state variable is updated as the first account in the accounts array returned by the listener. Otherwise, walletAddress is set as an empty string.
Finally, we must call it in our useEffect function:
useEffect(async () => {
    const {address, status} = await getCurrentWalletConnected();
    setWallet(address)
    setStatus(status);

    addWalletListener();
}, []);
And voila! We've completed programming all of our wallet functionality! Now that our wallet is set up, let's figure out how to mint our NFT!
Step 5: NFT Metadata 101
So remember the NFT metadata we just talked about in Step 0 of this tutorial—it brings an NFT to life, allowing it to have properties, such as a digital asset, name, description, and other attributes.
We're going to need to configure this metadata as a JSON object and store it, so we can pass it in as the tokenURI parameter when calling our smart contract's mintNFT function.
The text in the "Link to Asset", "Name", "Description" fields will comprise the different properties of our NFT's metadata. We'll format this metadata as a JSON object, but there are a couple options for where we can store this JSON object:
We could store it on the Ethereum blockchain; however, doing so would be SUPER expensive (we're talking upwards of hundreds of dollars) due to the nature of Ethereum. ❌
We could store it on a centralized server, like AWS or Firebase. But that would defeat our decentralization ethos. ❌
We could use IPFS, a decentralized protocol and peer-to-peer network for storing and sharing data in a distributed file system. As this protocol as decentralized and free, it is our best option! ✅
To store our metadata on IPFS, we will use Pinata, a convenient IPFS API and toolkit. In the next step, we'll explain exactly how to do this!
Step 6: Use Pinata to pin your metadata to IPFS
If you don't have a Pinata account, sign up for a free account here and complete the steps to verify your email and account.
Create your Pinata API key
Navigate to the https://pinata.cloud/keys page, then select the "New Key" button at the top, set the Admin widget as enabled, and name your key.
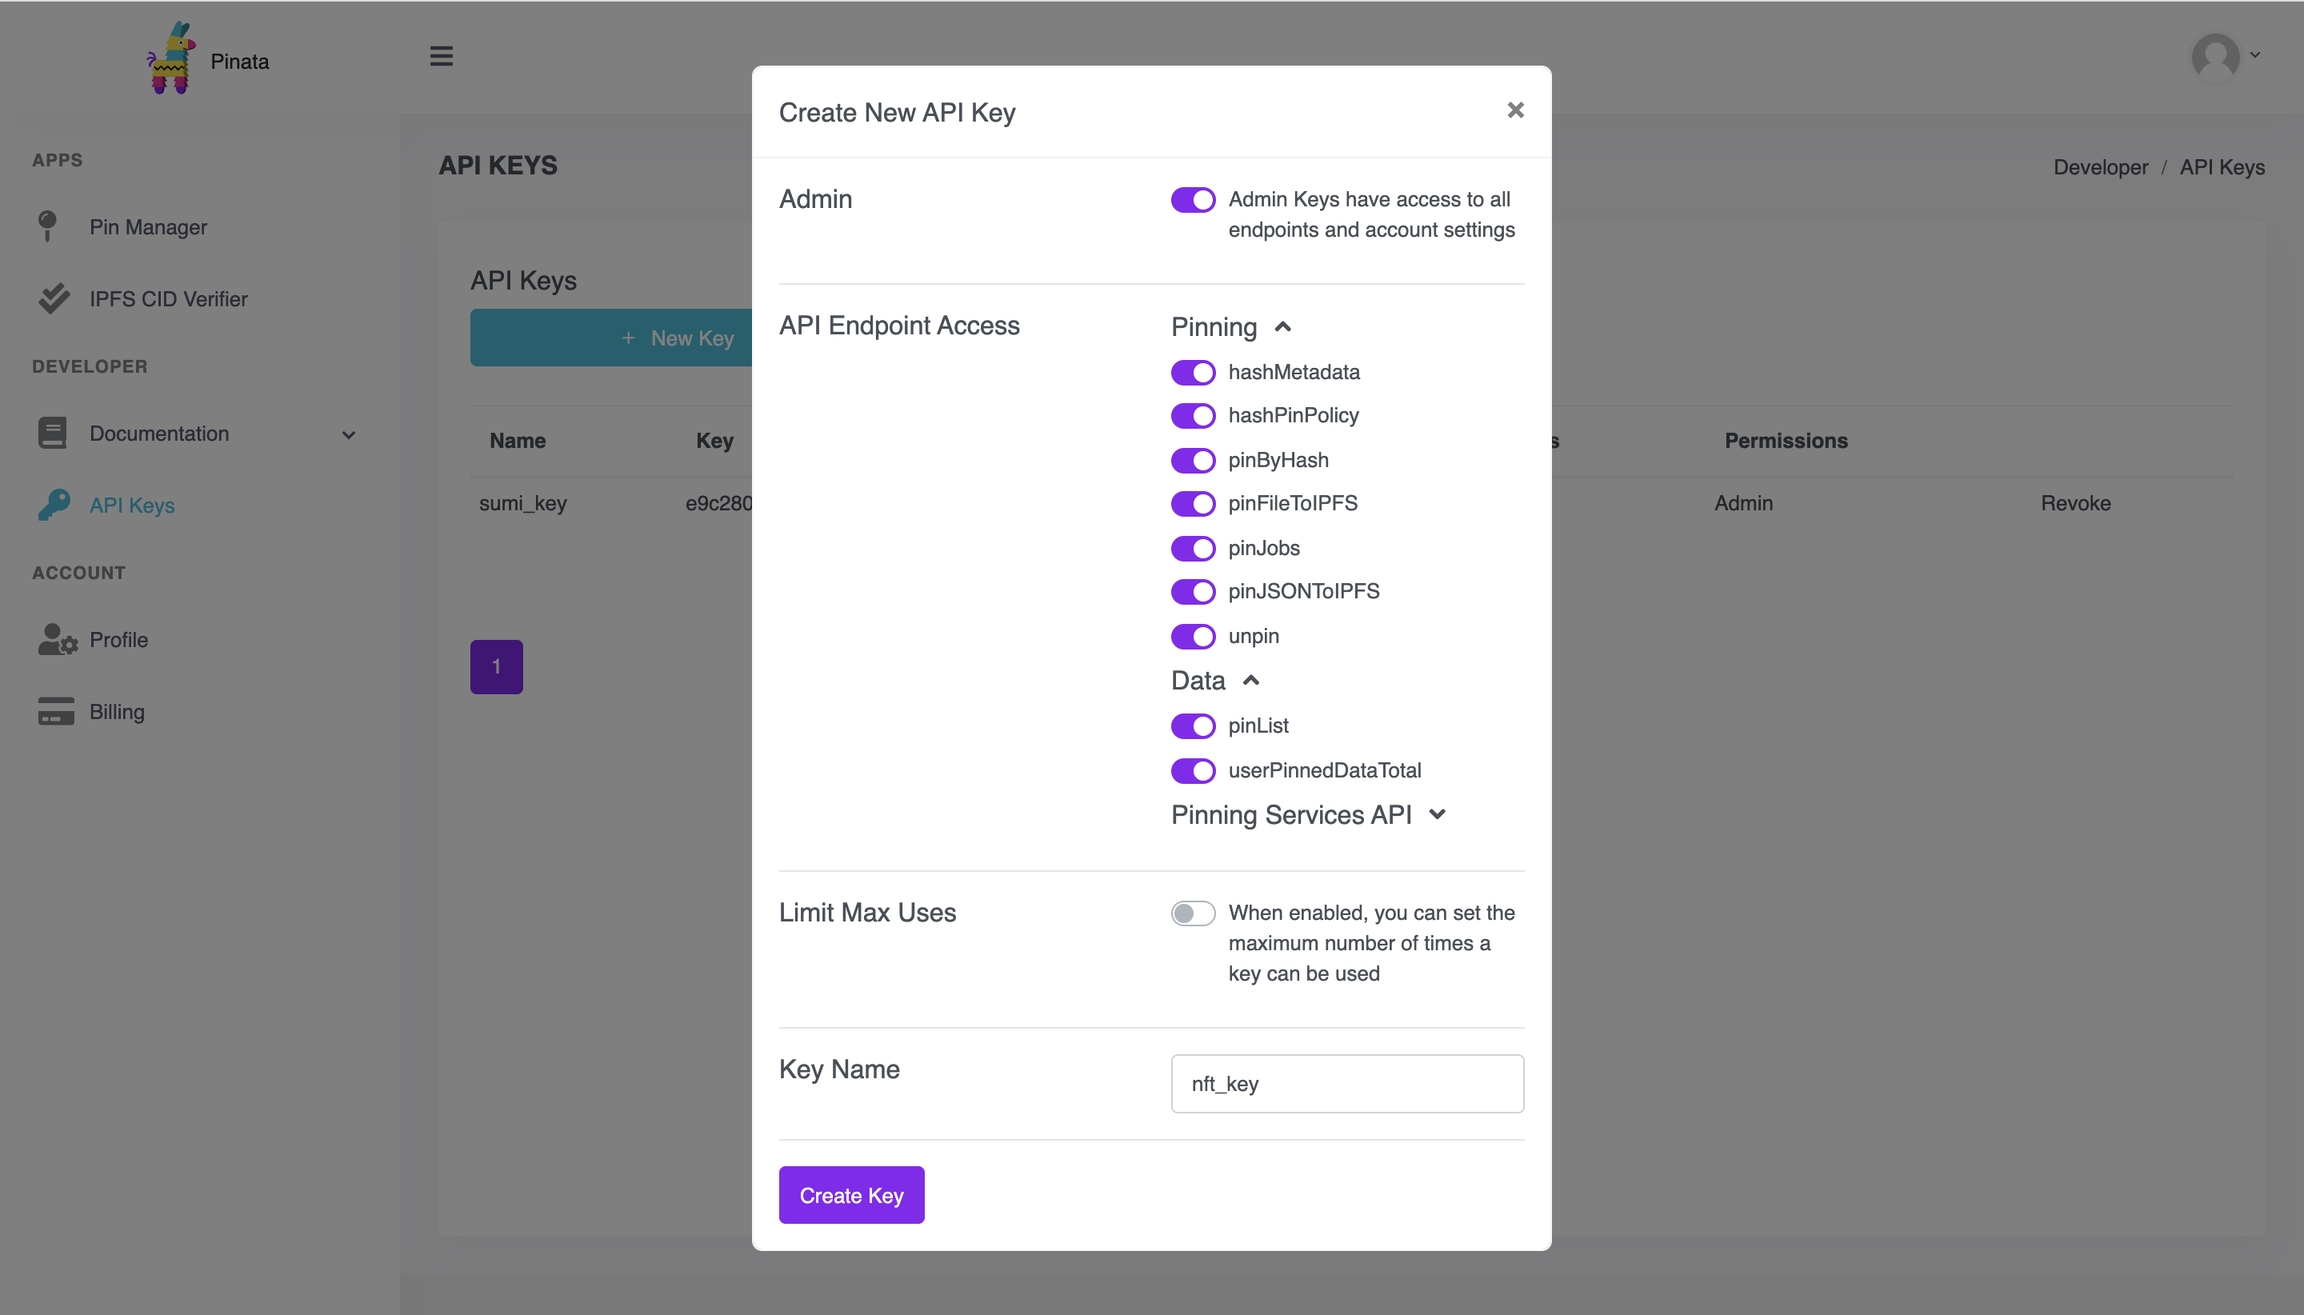
Create your Pinata API key
You'll then be shown a popup with your API info. Make sure to put this somewhere safe.

Make sure to save your API key and secret in a safe place
Now that our key is set up, let's add it to our project so we can use it.
Create a .env file
We can safely store our Pinata key and secret in an environment file. Let's install the dotenv package in your project directory.
Open up a new tab in your terminal (separate from the one running local host) and make sure you are in the minter-starter-files folder, then run the following command in your terminal:
npm install dotenv --saveNext, create a .env file in the root directory of your minter-starter-files by entering the following on your command line:
vim .envThis will pop open your .env file in vim (a text editor). To save it hit "esc" + ":" + "q" on your keyboard in that order.
Next, in VSCode, navigate to your .env file and add your Pinata API key and API secret to it, like so:
REACT_APP_PINATA_KEY =
REACT_APP_PINATA_SECRET =
Save the file, and then you're ready to start writing the function to upload your JSON metadata to IPFS!
Implement pinJSONToIPFS
Fortunately for us, Pinata has an API specifically for uploading JSON data to IPFS and a convenient JavaScript with axios example that we can use, with some slight modifications.
In your utils folder, let's create another file called pinata.js and then import our Pinata secret and key from the .env file like so:
require('dotenv').config();
const key = process.env.REACT_APP_PINATA_KEY;
const secret = process.env.REACT_APP_PINATA_SECRET;
Next, paste the additional code from below into your pinata.js file. Don't worry, we'll break down what everything means!
require('dotenv').config();
const key = process.env.REACT_APP_PINATA_KEY;
const secret = process.env.REACT_APP_PINATA_SECRET;

const axios = require('axios');

export const pinJSONToIPFS = async(JSONBody) => {
    const url = `https://api.pinata.cloud/pinning/pinJSONToIPFS`;
    //making axios POST request to Pinata ⬇️
    return axios
        .post(url, JSONBody, {
            headers: {
                pinata_api_key: key,
                pinata_secret_api_key: secret,
            }
        })
        .then(function (response) {
           return {
               success: true,
               pinataUrl: "https://gateway.pinata.cloud/ipfs/" + response.data.IpfsHash
           };
        })
        .catch(function (error) {
            console.log(error)
            return {
                success: false,
                message: error.message,
            }

    });
};
So what does this code do exactly?
First, it imports axios, a promise based HTTP client for the browser and node.js, which we will use to make a request to Pinata.
Then we have our asynchronous function pinJSONToIPFS, which takes a JSONBody as its input and the Pinata api key and secret in its header, all to make a POST request to their pinJSONToIPFS API.
If this POST request is successful, then our function returns an JSON object with the success boolean as true and the pinataUrl where our metadata was pinned. We will use this pinataUrl returned as the tokenURI input to our smart contract's mint function.
If this post request fails, then our function returns an JSON object with the success boolean as false and a message string that relays our error.
As with our connectWallet function return types, we're returning JSON objects so we can use their parameters to update our state variables and UI.
Step 7: Load your smart contract
Now that we have a way to upload our NFT metadata to IPFS via our pinJSONToIPFS function, we're going to need a way to load an instance of our smart contract so we can call its mintNFT function.
As we mentioned earlier, in this tutorial we will be using this existing NFT smart contract; however, if you'd like to learn how we made it, or make one yourself, we highly recommend you check out our other tutorial, "How to Create an NFT."
The contract ABI
If you examined our files closely, you'll have noticed that in our src directory, there's a contract-abi.json file. An ABI is necessary for specifying which function a contract will invoke as well ensuring that the function will return data in the format you're expecting.
We're also going to need an Alchemy API key and the Alchemy Web3 API to connect to the Ethereum blockchain and load our smart contract. But first, you'll need an Alchemy account.
If you don't already have an Alchemy account, sign up for free here.
Once you’ve created an Alchemy account, you can generate an API key by creating an app. This will allow us to make requests to the Ropsten test network.
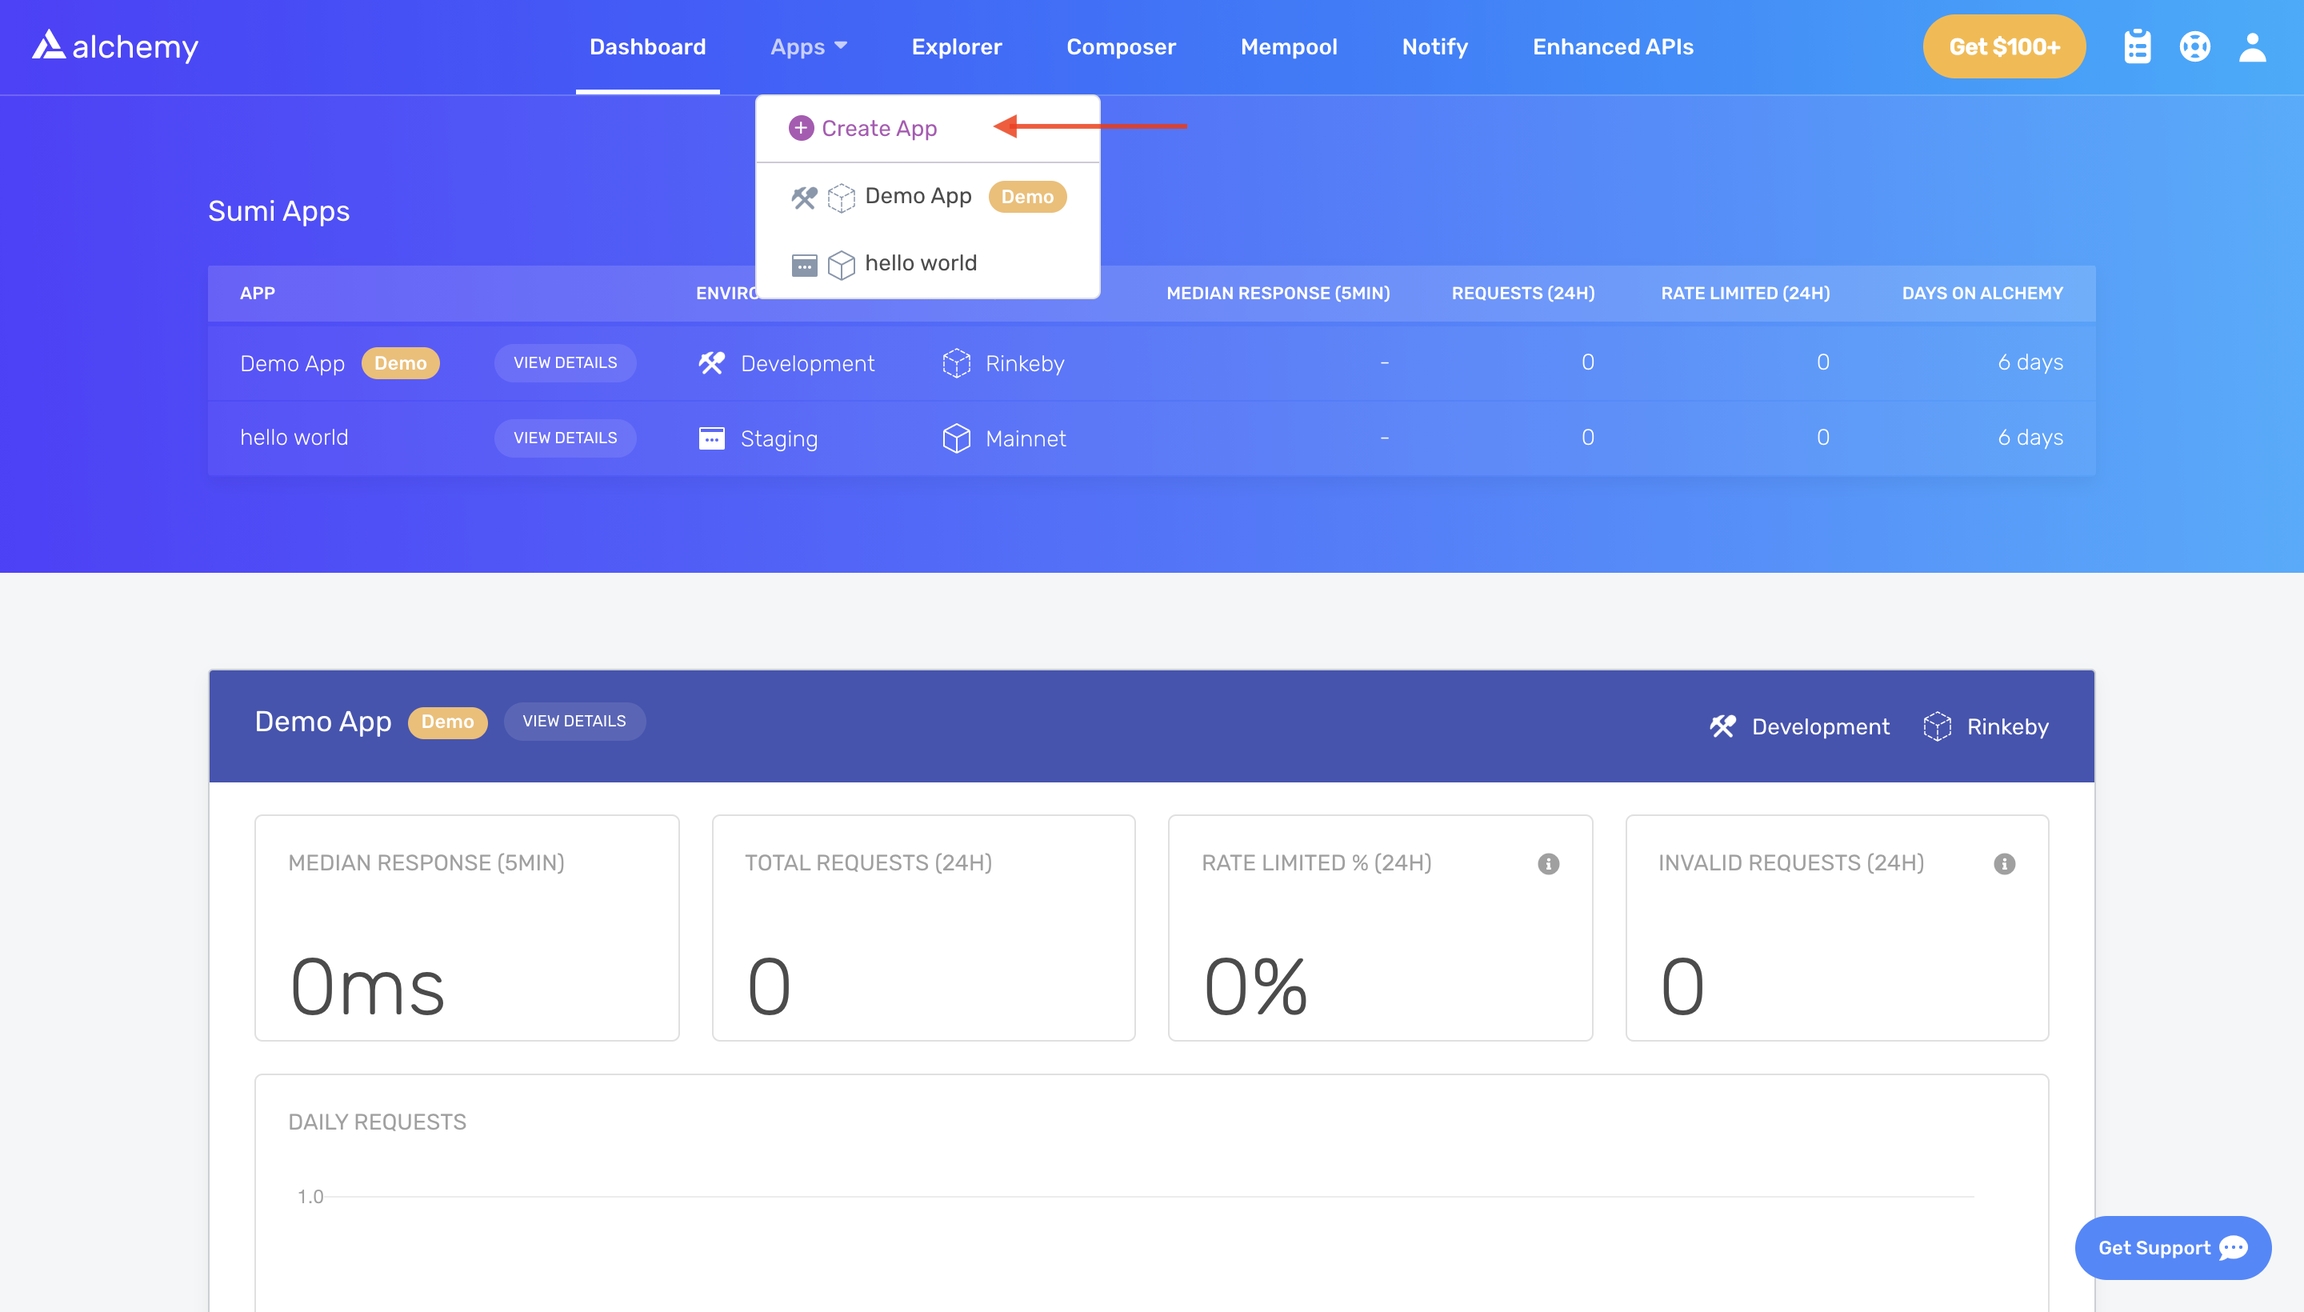
Navigate to the “Create App” page in your Alchemy Dashboard by hovering over “Apps” in the nav bar and clicking “Create App”
Create a new app
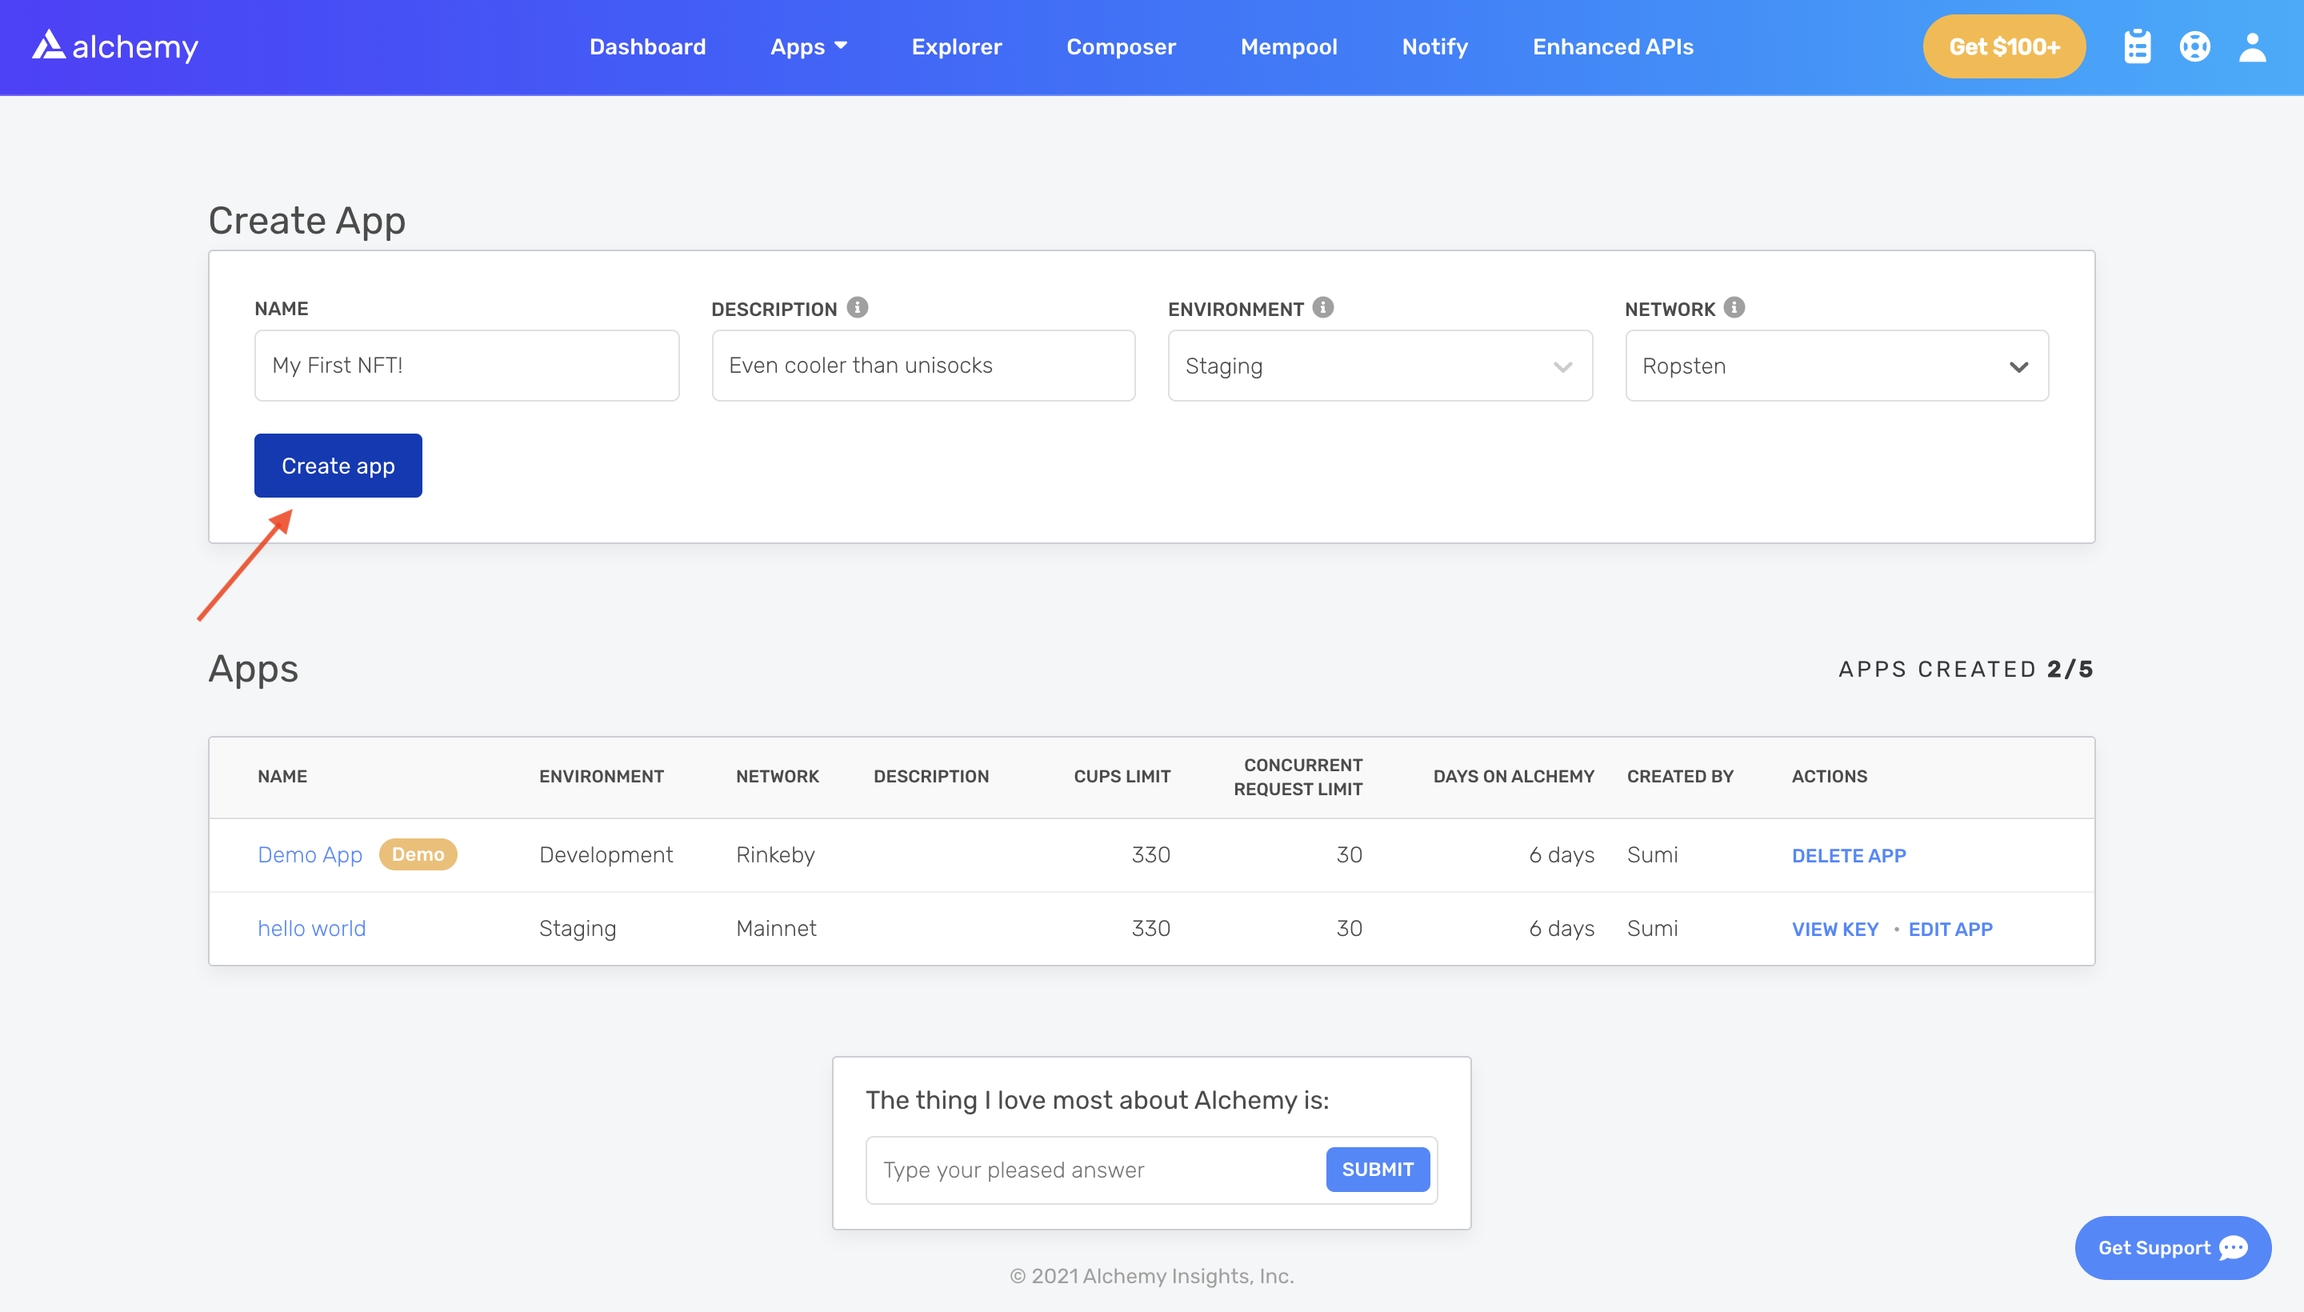
Name your app (we chose "My First NFT!"), offer a short description, select “Staging” for the Environment (used for your app bookkeeping), and choose “Ropsten” for your network.
Configure your app details
Click “Create app” and that’s it! Your app should appear in the table below.
Awesome so now that we've created our HTTP Alchemy API URL, copy it to your clipboard like so…
Copy your Alchemy API key
…and then let's add it to our .env file. Altogether, your .env file should look like this:
REACT_APP_PINATA_KEY =
REACT_APP_PINATA_SECRET =
REACT_APP_ALCHEMY_KEY = https://eth-ropsten.alchemyapi.io/v2/
Now that we have our contract ABI and our Alchemy API key, we're ready to load our smart contract using Alchemy Web3.
Set up your Alchemy Web3 endpoint and contract
First, if you don't have it already, you'll need to install Alchemy Web3 by navigating to the home directory: nft-minter-tutorial in the terminal:
cd ..
npm install @alch/alchemy-web3
Next let's go back to our interact.js file. At the top of the file, add the following code to import your Alchemy key from your .env file and set up your Alchemy Web3 endpoint:
require('dotenv').config();
const alchemyKey = process.env.REACT_APP_ALCHEMY_KEY;
const { createAlchemyWeb3 } = require("@alch/alchemy-web3");
const web3 = createAlchemyWeb3(alchemyKey);
Alchemy Web3 is a wrapper around Web3.js, providing enhanced API methods and other crucial benefits to make your life as a web3 developer easier. It is designed to require minimal configuration so you can start using it in your app right away!
Next, let's add our contract ABI and contract address to our file.
require('dotenv').config();
const alchemyKey = process.env.REACT_APP_ALCHEMY_KEY;
const { createAlchemyWeb3 } = require("@alch/alchemy-web3");
const web3 = createAlchemyWeb3(alchemyKey);

const contractABI = require('../contract-abi.json')
const contractAddress = "0x4C4a07F737Bf57F6632B6CAB089B78f62385aCaE";
Once we have both of those, we're ready to start coding our mint function!
Step 8: Implement the mintNFT function
Inside your interact.js file, let's define our function, mintNFT, which eponymously will mint our NFT.
Because we will be making numerous asynchronous calls (to Pinata to pin our metadata to IPFS, Alchemy Web3 to load our smart contract, and Metamask to sign our transactions), our function will also be asynchronous.
The three inputs to our function will be the url of our digital asset, name, and description. Add the following function signature below the connectWallet function:
export const mintNFT = async(url, name, description) => {
}
Input error handling
Naturally, it makes sense to have some sort of input error handling at the start of the function, so we exit this function if our input parameters aren't correct. Inside our function, let's add the following code:
export const mintNFT = async(url, name, description) => {
 //error handling
 if (url.trim() == "" || (name.trim() == "" || description.trim() == "")) {
   return {
    success: false,
    status: "❗Please make sure all fields are completed before minting.",
   }
  }
}
Essentially, if any of the input parameters are an empty string, then we return a JSON object where the success boolean is false, and the status string relays that all fields in our UI must be complete.
Upload the metadata to IPFS
Once we know our metadata is formatted properly, the next step is to wrap it into a JSON object and upload it to IPFS via the pinJSONToIPFS we wrote!
To do so, we first we need to import the pinJSONToIPFS function into our interact.js file. At the very top of the interact.js, let's add:
import {pinJSONToIPFS} from './pinata.js'Recall, that pinJSONToIPFS takes in a JSON body. So before we make a call to it, we're going to need to format our url, name, and description parameters into a JSON object.
Let's update our code to create a JSON object called metadata and then make a call to pinJSONToIPFS with this metadata parameter:
export const mintNFT = async(url, name, description) => {
 //error handling
 if (url.trim() == "" || (name.trim() == "" || description.trim() == "")) {
        return {
            success: false,
            status: "❗Please make sure all fields are completed before minting.",
        }
  }

  //make metadata
  const metadata = new Object();
  metadata.name = name;
  metadata.image = url;
  metadata.description = description;

  //make pinata call
  const pinataResponse = await pinJSONToIPFS(metadata);
  if (!pinataResponse.success) {
      return {
          success: false,
          status: "😢 Something went wrong while uploading your tokenURI.",
      }
  }
  const tokenURI = pinataResponse.pinataUrl;
}
Notice, we store the response of our call to pinJSONToIPFS(metadata) in the pinataResponse object. Then, we parse this object for any errors.
If there's an error, we return a JSON object where the success boolean is false and our status string relays that our call failed. Otherwise, we extract the pinataURL from the pinataResponse and store it as our tokenURIvariable.
Now it's time to load our smart contract using the Alchemy Web3 API that we initialized at the top of our file. Add the following line of code to the bottom of the mintNFT function to set the contract at the window.contract global variable:
window.contract = await new web3.eth.Contract(contractABI, contractAddress);The last thing to add in our mintNFT function is our Ethereum transaction:
//set up your Ethereum transaction
 const transactionParameters = {
        to: contractAddress, // Required except during contract publications.
        from: window.ethereum.selectedAddress, // must match user's active address.
        'data': window.contract.methods.mintNFT(window.ethereum.selectedAddress, tokenURI).encodeABI()//make call to NFT smart contract
 };

//sign the transaction via Metamask
 try {
    const txHash = await window.ethereum
        .request({
            method: 'eth_sendTransaction',
            params: [transactionParameters],
        });
    return {
        success: true,
        status: "✅ Check out your transaction on Etherscan: https://ropsten.etherscan.io/tx/" + txHash
    }
 } catch (error) {
    return {
        success: false,
        status: "😥 Something went wrong: " + error.message
    }

 }
If you're already familiar with Ethereum transactions, you'll notice that the structure is pretty similar to what you've seen.
First, we set up our transactions parameters.
to specifies the the recipient address (our smart contract)
from specifies the signer of the transaction (the user's connected address to Metamask: window.ethereum.selectedAddress)
data contains the call to our smart contract mintNFT method, which receives our tokenURI and the user's wallet address, window.ethereum.selectedAddress, as inputs
Then, we make an await call, window.ethereum.request, where we ask Metamask to sign the transaction. Notice, in this request, we're specifying our eth method (eth_SentTransaction) and passing in our transactionParameters. At this point, Metamask will open up in the browser, and prompt the user to sign or reject the transaction.
If the transaction is successful, the function will return a JSON object where the boolean success is set to true and the status string prompts the user to check out Etherscan for more information about their transaction.
If the transaction fails, the function will return a JSON object where the success boolean is set to false, and the status string relays the error message.
Altogether, our mintNFT function should look like this:
export const mintNFT = async(url, name, description) => {

    //error handling
    if (url.trim() == "" || (name.trim() == "" || description.trim() == "")) {
        return {
            success: false,
            status: "❗Please make sure all fields are completed before minting.",
        }
    }

    //make metadata
    const metadata = new Object();
    metadata.name = name;
    metadata.image = url;
    metadata.description = description;

    //pinata pin request
    const pinataResponse = await pinJSONToIPFS(metadata);
    if (!pinataResponse.success) {
        return {
            success: false,
            status: "😢 Something went wrong while uploading your tokenURI.",
        }
    }
    const tokenURI = pinataResponse.pinataUrl;

    //load smart contract
    window.contract = await new web3.eth.Contract(contractABI, contractAddress);//loadContract();

    //set up your Ethereum transaction
    const transactionParameters = {
        to: contractAddress, // Required except during contract publications.
        from: window.ethereum.selectedAddress, // must match user's active address.
        'data': window.contract.methods.mintNFT(window.ethereum.selectedAddress, tokenURI).encodeABI() //make call to NFT smart contract
    };

    //sign transaction via Metamask
    try {
        const txHash = await window.ethereum
            .request({
                method: 'eth_sendTransaction',
                params: [transactionParameters],
            });
        return {
            success: true,
            status: "✅ Check out your transaction on Etherscan: https://ropsten.etherscan.io/tx/" + txHash
        }
    } catch (error) {
        return {
            success: false,
            status: "😥 Something went wrong: " + error.message
        }
    }
}
That's one giant function! Now, we just need to connect our mintNFT function to our Minter.js component...
Step 9: Connect mintNFT to our Minter.js frontend
Open up your Minter.js file and update the import { connectWallet } from "./utils/interact.js"; line at the top to be:
import { connectWallet, mintNFT } from "./utils/interact.js";Finally, implement the onMintPressed function to make await call to your imported mintNFT function and update the status state variable to reflect whether our transaction succeeded or failed:
const onMintPressed = async () => {
    const { status } = await mintNFT(url, name, description);
    setStatus(status);
};
Step 10:
Last updated
Was this helpful?